.png)
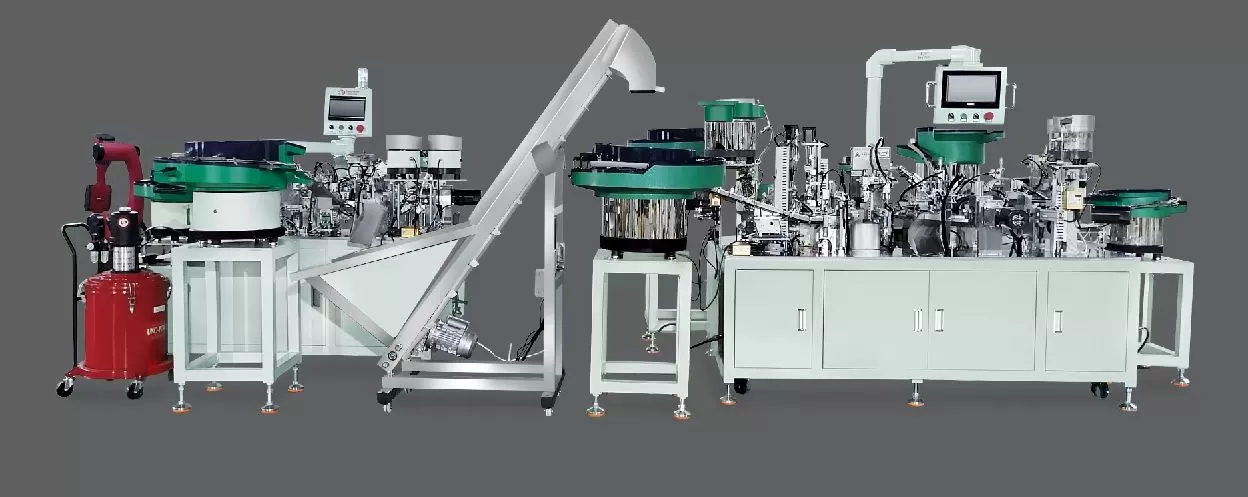
The inspection and testing process is a critical phase in ensuring the performance, reliability, and safety of Jieyang hinge automatic assembly machines. As a professional manufacturer specializing in hinge assembly machines, telescopic drawer slide assembly machines, and roll forming machines, Sanyhore understands that each machine must undergo rigorous validation to meet industry standards and customer expectations. This article details the key steps involved in this process, designed to guarantee the consistent quality of our automatic assembly solutions.
1. Initial Component Inspection: Laying the Groundwork for Quality
Before any assembly begins, the core components of the hinge automatic assembly machine are subjected to initial inspection. This includes verifying the quality of raw materials, such as metal alloys for hinges, ensuring they meet material strength and durability requirements. Component dimensions are checked using precision tools like calipers and micrometers to confirm they align with design specifications, while surface finishes are inspected for defects like scratches or deformities. Additionally, fasteners and structural parts undergo load-bearing tests to ensure they can withstand operational stress, laying the foundation for a robust final product.
2. Mechanical Performance Testing: Evaluating Durability and Functionality
Mechanical performance testing focuses on assessing the machine’s ability to withstand long-term use and handle operational demands. This involves load capacity tests, where the machine is subjected to simulated production loads to check for structural integrity. Component wear resistance is evaluated through repeated cycling tests—for example, moving parts like grippers or conveyors are operated thousands of times to ensure they maintain precision and do not degrade prematurely. Vibration analysis is also conducted to identify any mechanical imbalances, ensuring smooth operation and minimizing downtime during production.
3. Electrical System Verification: Ensuring Reliable Circuitry and Control
The electrical system of the automatic assembly machine is a vital component, requiring thorough verification to prevent malfunctions. Circuit connections are checked for loose wires or short circuits using multimeter tests, while sensors—such as position sensors and pressure transducers—are calibrated to ensure accurate data transmission. Control systems, including PLCs and HMI interfaces, are tested for responsiveness, with operators simulating production scenarios to confirm the machine’s ability to adjust settings and coordinate movements in real time. This step ensures the electrical system operates reliably under varying production conditions.
4. Assembly Accuracy Calibration: Precision in Every Joint
Accurate assembly is key to the hinge automatic assembly machine’s performance, so calibration of key components is critical. Using precision measurement tools like coordinate measuring machines (CMMs), the alignment of assembly stations, gripper positions, and tooling is checked against design tolerances. For example, the distance between hinge components during assembly is verified to ensure the final product meets dimensional requirements, while torque settings for fasteners are calibrated to prevent over-tightening or under-tightening, which could affect hinge functionality. This calibration ensures each assembled hinge meets the required quality standards.
5. Operational Stability Testing: Long-Term Consistency
To validate the machine’s ability to maintain performance over time, operational stability testing is conducted through extended runtime simulations. The machine is operated continuously for predefined periods, typically 8–12 hours, while monitoring parameters like speed, accuracy, and temperature. Data logging tracks any gradual changes in performance, such as increased error rates or component drift, allowing engineers to adjust settings or replace parts before the machine is deployed. This step ensures the machine remains reliable even during extended production shifts, reducing the risk of unplanned downtime.
6. Safety Compliance Check: Protecting Operators and Production
Safety is non-negotiable in industrial machinery, so compliance with safety standards is rigorously verified.急停按钮 (emergency stop buttons), safety light curtains, and protective guards are tested to ensure they function as intended, with operators simulating emergency scenarios to confirm rapid shutdowns. Overload protection systems, such as thermal fuses for motors or current limiters for drives, are triggered to verify they prevent damage to the machine and operators. This check ensures the machine adheres to local and international safety regulations, creating a secure working environment.
7. Final Quality Assurance: Sealing the Quality Promise
Before leaving the production facility, each hinge automatic assembly machine undergoes a final quality assurance review. A sampling of assembled hinges is tested for key performance metrics, including opening/closing force, hinge life, and alignment, to confirm they meet customer specifications. Documentation, such as test reports and calibration records, is compiled and provided to customers, ensuring transparency and traceability. This final step ensures the machine is not only functional but also ready to deliver consistent results in real-world production settings.
At Sanyhore, our commitment to quality is reflected in every stage of the inspection and testing process. By combining technical expertise with rigorous validation, we ensure our hinge automatic assembly machines, telescopic drawer slide assembly machines, and roll forming machines meet the demands of modern manufacturing. If you are seeking a reliable, high-precision assembly solution, contact our sales manager at +86 13425506550 or email info@sanyhore.com to discuss your project requirements.

