
To ensure the optimal performance of the Jieyang Hinge Automatic Assembly Machine, a well-structured installation and debugging process is essential. This guide outlines key steps to achieve a seamless setup, from pre-installation preparation to post-commissioning verification, tailored for manufacturers prioritizing efficiency and reliability.
Pre-Installation Preparation:
Before any physical setup, thorough preparation minimizes delays and errors. First, confirm the installation site meets requirements: a flat, stable floor with sufficient space for machine operation and maintenance (at least 2 meters around the unit). Ensure the power supply matches specifications (e.g., 380V/50Hz for industrial machinery) and that grounding systems are correctly installed to prevent electrical hazards.
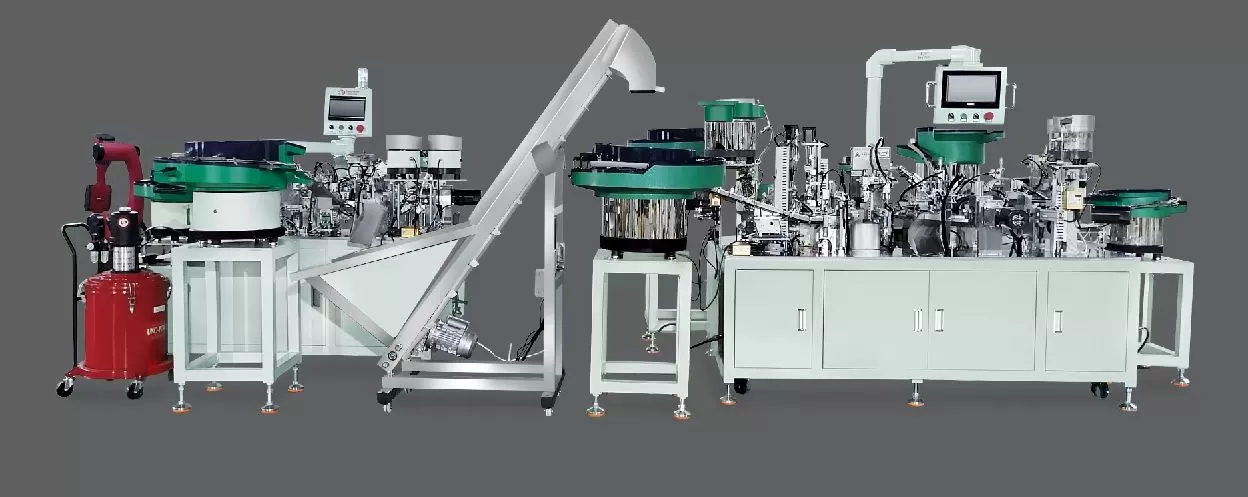
Next, inspect all machine components. The package should include a main frame, drive system, conveyor belt, tooling fixtures, control panel, and electrical cables. Verify no damage or missing parts by cross-referencing the packing list with the equipment manual. Calibrate measuring tools (e.g., calipers, level meters) to ensure precision during mechanical alignment later.
Mechanical Installation: Framing and Component Setup:
Start with securing the main frame. Use level meters to ensure the frame is horizontal and stable, adjusting with shims under the base if necessary. Mount the drive system (including motors and gearboxes) to the frame, aligning shafts with keyways to prevent misalignment, which can cause premature wear.
Install the conveyor belt system next, ensuring it runs parallel to the machine’s centerline. Tighten belts to the specified tension and check for smooth rotation using a dial indicator to measure radial runout (target: ≤0.1mm). Secure tooling fixtures—critical for hinge positioning—with precision bolts, then test fixture movement to confirm they align with the assembly sequence defined in the machine’s programming.
Electrical and Control System Integration:
Connecting the electrical system requires strict adherence to wiring diagrams. First, terminate power cables to the main distribution box, ensuring phase sequence and voltage ratings match. Install sensors (e.g., photoelectric sensors for part detection, proximity sensors for position feedback) and route cables through conduit or cable carriers to prevent damage.
Configure the control system by uploading the machine’s software (e.g., PLC program) via USB or Ethernet. Test communication between components: verify the HMI (Human-Machine Interface) displays real-time data, and ensure the control system can send signals to actuators (e.g., cylinders, servos) without lag. Double-check all connections for loose terminals or exposed wires, as these can lead to short circuits or unresponsive operations.
Debugging Phase: Calibration and Parameter Fine-Tuning:
The debugging phase focuses on optimizing machine performance. Begin with homing calibration: the machine should reference its origin to set initial positions for all axes. Use the HMI to execute the homing sequence, adjusting limit switches if the machine fails to find its reference point.
Next, test component synchronization. For example, when feeding hinges into the assembly station, monitor the conveyor speed and tooling clamp timing to prevent jams. Adjust parameters like conveyor belt speed, clamping force, and press stroke length based on hinge material (e.g., stainless steel vs. aluminum) and thickness, using the manual to set optimal values.
Conduct a series of short runs to identify issues. Track cycle time (target: ≤10 seconds per hinge for high-volume production) and check for misassemblies, such as incomplete hinge closure or incorrect pin insertion. Use the machine’s diagnostic tools to log errors, then troubleshoot by inspecting sensor alignment, tool wear, or program logic.
Functional Testing and Performance Optimization:
After resolving initial issues, perform full functional testing. Run the machine for 8–12 hours with a batch of 500–1000 hinges, recording metrics like assembly accuracy (checking for 0.05mm tolerance on hinge gap), repeatability (cycle-to-cycle variation <0.02mm), and defect rate (aiming for <0.1%).
Optimize based on test results. If the defect rate is high, recheck tooling alignment or adjust the press depth. For slow cycle times, review motor parameters or upgrade conveyor belt materials for smoother movement. Document all adjustments in the machine’s operation manual to aid future maintenance.
Post-Installation Safety Verification and Support:
Before full production, conduct a safety audit. Ensure emergency stop buttons are accessible and functional, safety fences are properly installed, and the machine meets local electrical safety standards (e.g., IEC 61496). Train operators on basic operation and emergency procedures, emphasizing the importance of not bypassing safety protocols.
As a professional manufacturer of hinge assembly machines, telescopic drawer slide assembly machines, and roll forming machines, Sanyhore is committed to supporting your success. Our team provides on-site installation guidance, technical training, and post-warranty maintenance support. Contact us at +86 13425506550 or via email at info@sanyhore.com to discuss your project and ensure your hinge assembly line operates at peak efficiency.